
Grab Bars Installation

Grab Bars Installation
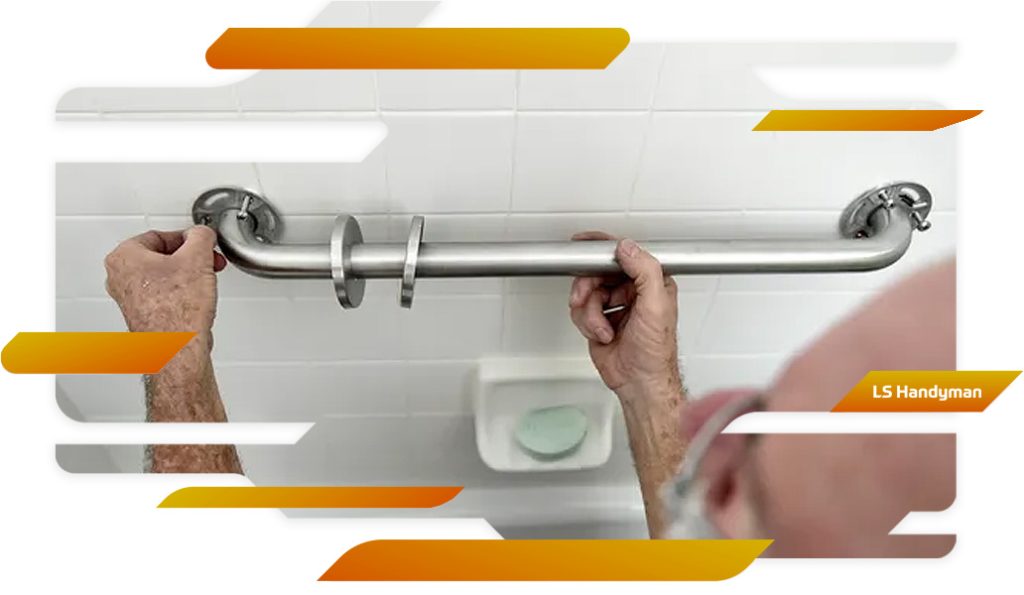
A grab bar is a safety device typically mounted on bathroom walls near toilets, bathtubs, and showers to provide stability and support for individuals when standing or moving around. It helps prevent slips and falls, especially for seniors or individuals with mobility limitations. Grab bars come in various lengths, styles, and materials to suit different needs and aesthetic preferences. A common material used for grab bars is stainless steel, known for its durability and resistance to corrosion in wet environments like bathrooms.
Adding to the functionality of grab bars, some models also feature textured surfaces or non-slip grips to enhance their grip and ensure a secure hold, even when wet. This added feature further reduces the risk of accidents and provides extra peace of mind for users. In addition to their practical benefits, grab bars can also be stylish and complement the overall design of the bathroom. By incorporating grab bars into the bathroom decor, they seamlessly blend in while serving an essential safety function. Whether discreetly integrated or making a bold design statement, grab bars are a valuable addition to any bathroom, promoting independence and safety for all users.
Installing a grab bar is a relatively simple and straightforward process. Here are the general steps to install a grab bar:
1. Determine the location: Decide where you want the grab bar to be installed. It should be placed in a location that provides adequate support and stability.
2. Locate wall studs: Use a stud finder to locate the wall studs in the chosen location. Grab bars need to be securely anchored to wall studs for maximum strength.
3. Mark the holes: Once you have located the wall studs, use a pencil to mark the holes where the grab bar will be attached to the wall. Ensure that the marks are level and aligned.
4. Drill pilot holes: Use a drill and an appropriate size drill bit to drill pilot holes on the marked spots. Make sure the holes are slightly smaller than the screws that will be used to attach the grab bar.
5. Attach the mounting brackets: Securely fasten the mounting brackets to the wall studs using screws. Make sure the brackets are aligned with the pilot holes.
6. Install the grab bar: Slide the grab bar onto the mounting brackets and secure it in place using the provided screws. Make sure the grab bar is level and tightly attached to the wall.
7. Test the grab bar: Once the grab bar is installed, test its stability by applying pressure to it. Ensure that it is securely attached to the wall and can support your weight.
8. Finish up: Tighten any loose screws, clean up any debris, and ensure the grab bar is securely in place.
It’s important to refer to the specific instructions provided by the manufacturer of the grab bar you are installing, as installation methods may vary depending on the type and brand of the grab bar. If you are unsure about any step of the installation process, consider seeking the help of a LS handyman and we are ready to assist to install the grab bar in professional way.